Creating a Re-Usable Presto Worker Image in EC2
Thu, Jul 25, 2019When you have to create a Presto cluster, managing a lot of workers is a pain. So people have built different tools around it to make this easy. but when you don't have any tool like that for the rescue, you can use this approach to set up a machine image that can be used to run as many workers as you want without doing any configuration on each machine.
Okay, first you need to get this right on one instance.
Before you begin, make sure
- That you have a working coordinator instance.
- You have a security group for your coordinator node
Okay, Assuming you have a working coordinator node, let's start creating our Presto worker image.
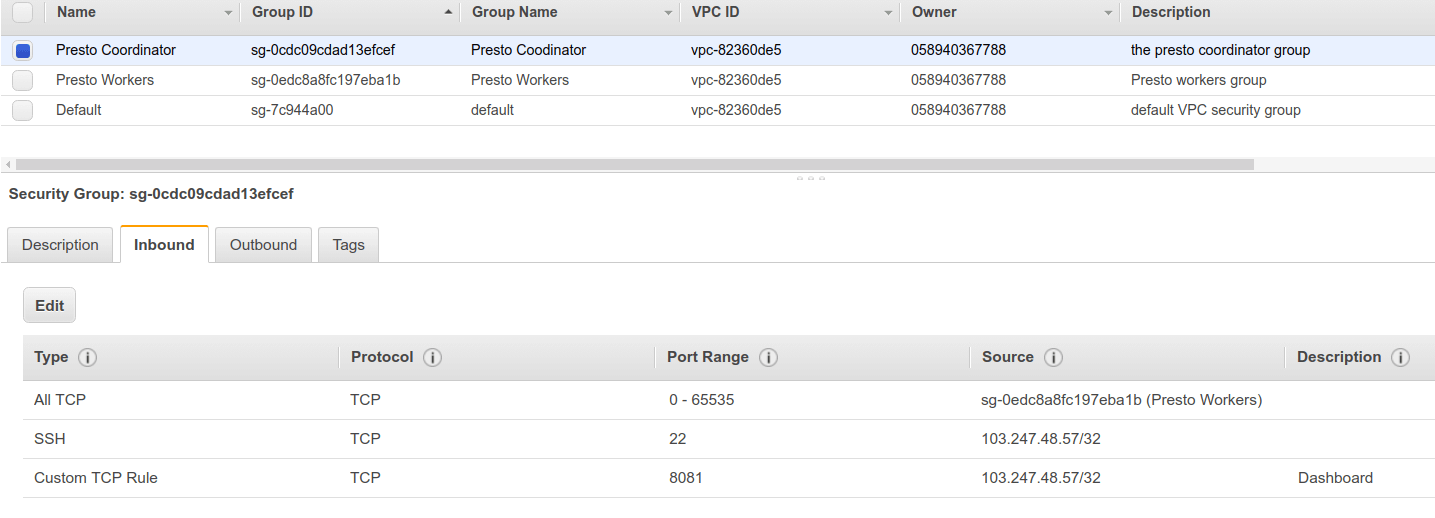
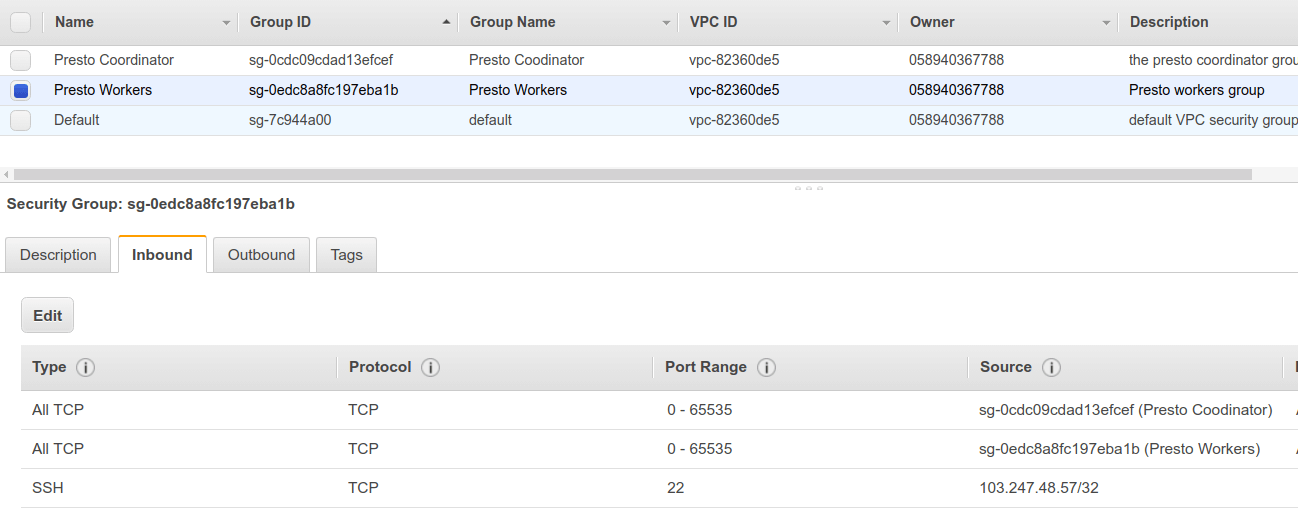
Create a security group for the worker nodes and allow traffic from the coordinator and allow traffic from the same security group. Also, edit the coordinator group to allow traffic from the worker group.


Okay, Now our security rules are ready. lets install Presto. Spin up a node and connect to it.
Now we can download and install Presto. (copy the latest version link from the Presto website)
cd ~
wget https://repo1.maven.org/maven2/io/prestosql/presto-server/316/presto-server-316.tar.gz -O ./presto.tar.gz
tar -xvzf presto.tar.gz # extract the archive
mv ./presto-server-316 ./presto #move to the ~/presto folder
rm ./presto.tar.gz
Okay, Now we should install the required tools which are Java and Python.
# Installing Java
sudo apt-get update
sudo apt-get install openjdk-8-jdk

# Install Python
sudo apt install python2.7 python-pip
Let's also create the missing data folder for Presto.
mkdir ~/presto/data
With that done, we can now configure Presto installation.
Create a the file ~/presto/etc/node.properties.
node.environment=production
node.id=ffffffff-ffff-ffff-ffff-ffffffffffff
node.data-dir=~/presto/data
Create the file ~/presto/etc/jvm.config.
-server
-Xmx16G
-XX:+UseG1GC
-XX:G1HeapRegionSize=32M
-XX:+UseGCOverheadLimit
-XX:+ExplicitGCInvokesConcurrent
-XX:+HeapDumpOnOutOfMemoryError
-XX:+ExitOnOutOfMemoryError
Create the file ~/presto/etc/config.properties (replace the coordinator ip)
coordinator=false
http-server.http.port=8081
discovery.uri=http://<coordinator ip>:8081
You can also configure catalogs at this time.
Now give it a try by running Presto.
cd ~/presto/bin
./launcher run
If you get the service started message. you are ready to go ahead. you can stop Presto service now.
Here comes the interesting part. in the node.properties file, we have the value ffffffff-ffff-ffff-ffff-ffffffffffff. actually, this value should be a GUID.
So what we are going to do is to auto-generate a GUID and replace this value when the system is starting. and run Presto as a service.
Let's create a script that will run at startup and start Presto service.
create the file ~/runpresto.sh and put the content
#!/bin/sh -
# Replace the placeholder with a GUID
sed -i "s/ffffffff-ffff-ffff-ffff-ffffffffffff/$(uuidgen)/" /home/ubuntu/presto/etc/node.properties
# Run presto
/home/ubuntu/presto/bin/launcher run
And make the file runnable.
chmod u+x ~/runpresto.sh
Now we can run this script at startup. for that, we can use systemd.
Let's create a service file for Presto.
Create the file /etc/systemd/system/presto.service.
Description=Presto Worker

[Service]
ExecStart=/home/ubuntu/runpresto.sh
RemainAfterExit=no
Restart=on-failure
RestartSec=5s

[Install]
WantedBy=multi-user.targer
Here we say the service should re-start in 5 seconds if failed. Now we can register our service.
run sudo systemctl daemon-reload and
sudo systemctl enable presto.service to make the script run at startup.
Restart the instance and Wait few seconds and run sudo systemctl status presto.service to see if the service is running.

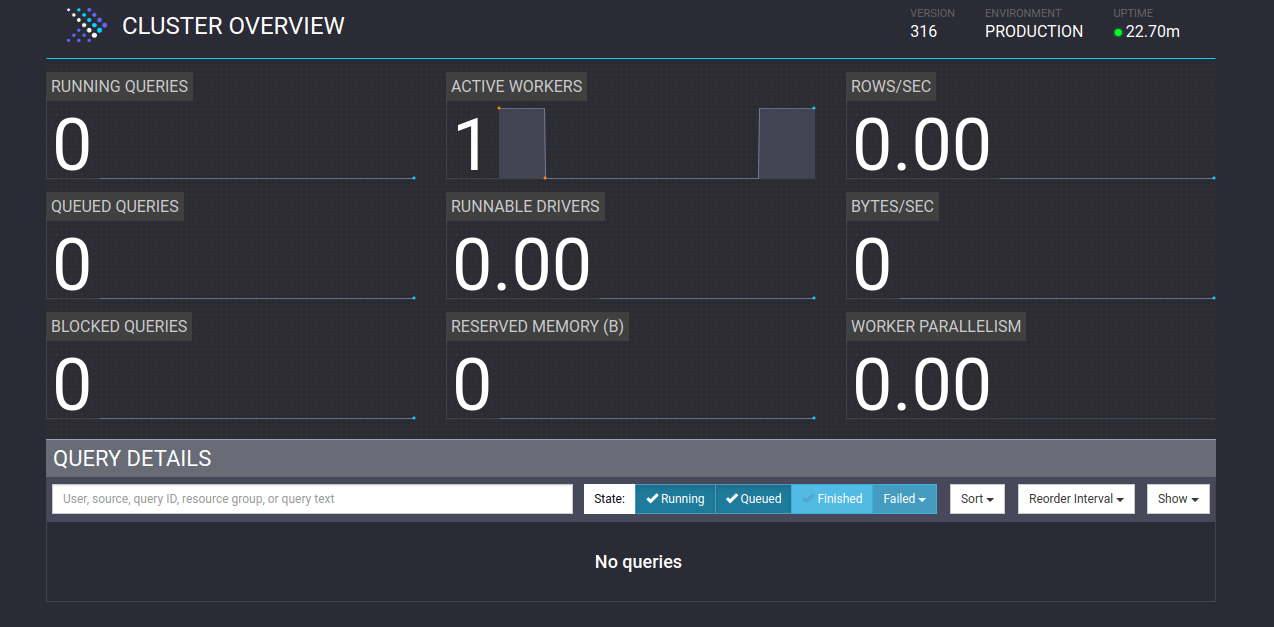
you can also check the Presto dashboard to see if the worker is connected.

Now, stop the instance and create a machine image from it.

Now you can use this machine image to run as many workers you want.
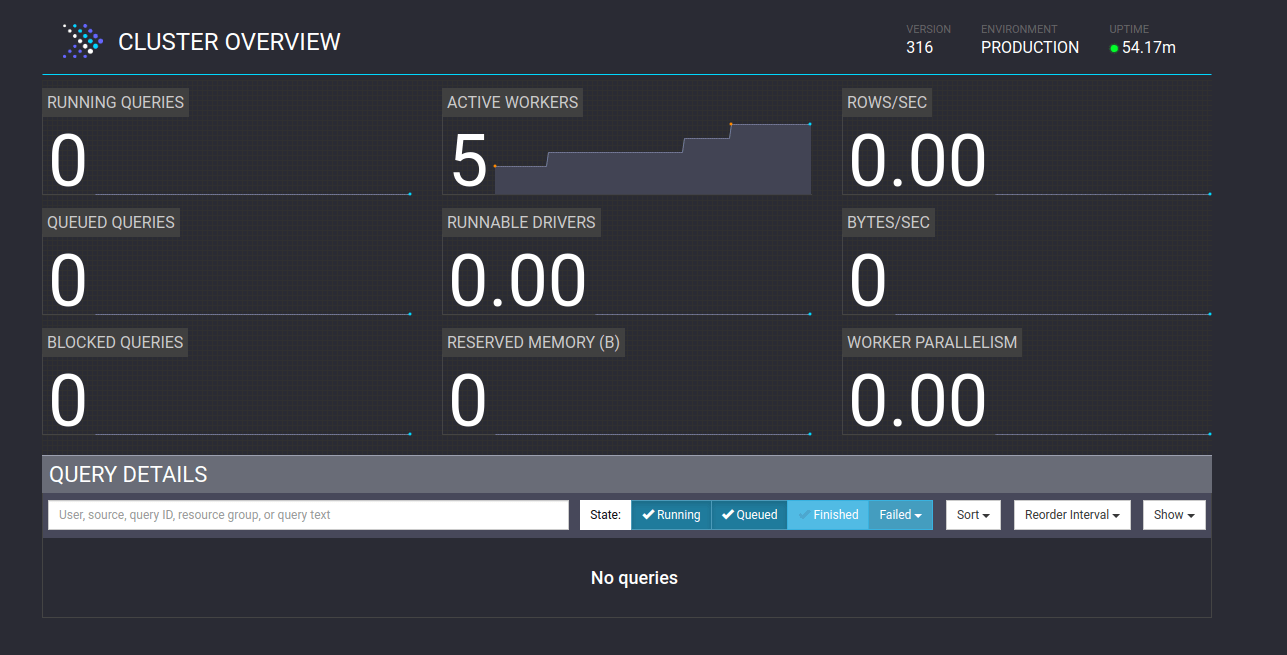
Here, I have started 5 workers.

And all workers are connected and ready to use.
