


Running a Nuget Feed on S3 with Automated Deployments
Sat, Nov 2, 2019
Whenever you wanted to create a separate Nuget feed for your Nuget packages, there are Nuber of ways to do that. Most of them include some computing. which means you have to provision a server and run a Nuget application on a computer. But its also possible to create a static Nuget feed on a cloud file system like S3. One way to do this is by using the Sleet tool. which is an open-source and free application.
What is Sleet
Sleet is a CLI tool that allows you to create Nuget feeds on S3 or Azure Storage easily. Sleet creates a file system that doesn't require any computing (Serverless). Sleet also supports Symbols so you can create a symbol server easily.
Automating
You can do everything Sleet can do with just your terminal and an S3 bucket. but this post is about automating that process with Git, GitLab(or any other CI provider). I am going to create a solution with few Class libraries and create a deployment pipeline to automatically deploy them as Nuget packages to our Nuget source which will be in S3.
Check the Sleet Documentation for detailed information about Sleet.
Setting up the S3 Bucket
The first thing we have to do is to create the S3 bucket that we will be using to create the Nuget feed. I am going to name mine as rusith.nugetpackages. To access the bucket, you will have to make it public. You can limit it to an IP range if you want to increase security. So change the bucket policy to something like below. It will allow access to the bucket from anywhere.
{
  "Version": "2012-10-17",
  "Statement": [
    {
      "Sid": "AddPerm",
      "Effect": "Allow",
      "Principal": "*",
      "Action": "s3:GetObject",
      "Resource": "arn:aws:s3:::<your bucket name>/*"
    }
  ]
}
IAM Settings
Now our bucket is all setup. Now we need a way to modify the content of the bucket from the CI server. for this, we can create an IAM policy that will give access to the S3 bucket and then, create a user with that policy attached. Then we can use the credentials of that user from the CI server to upload files.
The IAM policy should be something like below. It will give write access to the source bucket that we have created.
{
  "Version": "2012-10-17",
  "Statement": [
    {
      "Sid": "VisualEditor0",
      "Effect": "Allow",
      "Action": ["s3:PutObject", "s3:GetObjectAcl", "s3:GetObject", "s3:ListBucket", "s3:DeleteObject"],
      "Resource": ["arn:aws:s3:::<bucket name>/*", "arn:aws:s3:::<bucket name>"]
    },
    {
      "Sid": "VisualEditor1",
      "Effect": "Allow",
      "Action": [
        "s3:GetAccountPublicAccessBlock",
        "s3:ListAllMyBuckets",
        "s3:ListJobs",
        "s3:CreateJob",
        "s3:HeadBucket"
      ],
      "Resource": "*"
    }
  ]
}
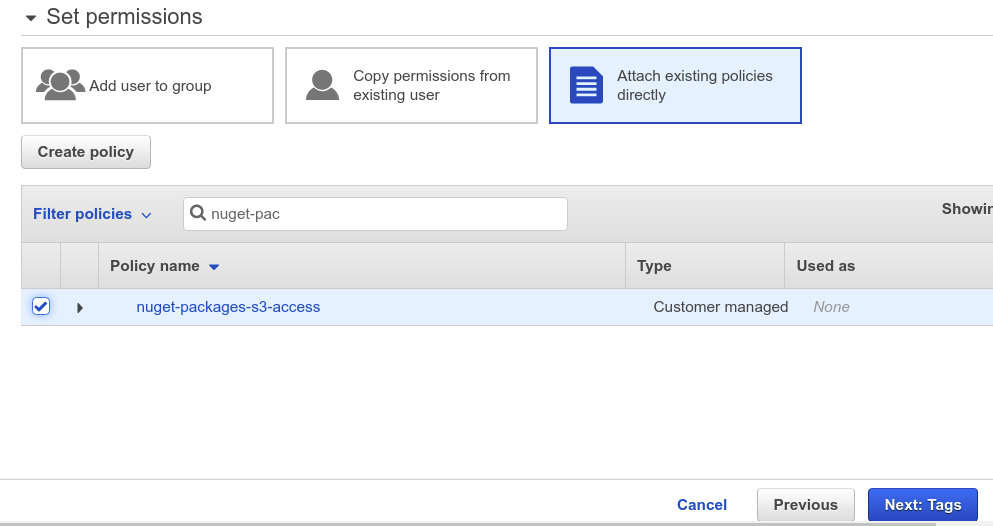
IAM policy is now ready to be used. Now we just have to create a new user and attach the policy to that user. Make sure you have given programmatic access to the user when creating. as we are going to use these credentials only through the API. it is necessary to have programmatic access.
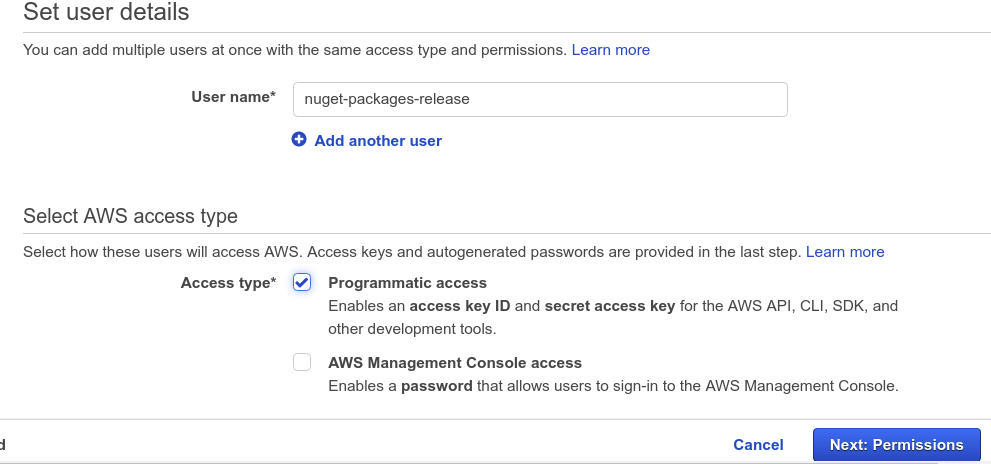
And don't forget to attach the policy you just created.
Once the user is created. don't forget to take a copy of the access keys of the user. Now the IAM part is done. we can go ahead and implement our packages.
Creating the Packages
For this demonstration, I will create a simple solution with only two class libraries that can be used as Nuget packages. Below commands will create the solution structure.
dotnet new sln --name NugetPackages
dotnet new classlib --name Rusith.FileHelpers
dotnet new classlib --name Rusith.EmailHelpers
dotnet sln ./NugetPackages.sln add ./Rusith.EmailHelpers/Rusith.EmailHelpers.csproj
dotnet sln ./NugetPackages.sln add ./Rusith.FileHelpers/Rusith.FileHelpers.csproj
Now you can write your code for each library that should be there in the 1.0 version if you like. And make sure you have filled the information required to create a Nuget package in each project.

Now you will have to initialize the Git repository, create the origin repository and push the code if you haven't already.
CI
Okay, now we have the projects with us, now we can go ahead and start creating the CI pipeline to automate the build process with Gitlab. My approach will be to create a single script that will go through all projects in the solution, push them to S3 using Sleet. The script for doing that would look like below.
export PATH="$PATH:/root/.dotnet/tools"
dotnet tool install -g sleet # Installing Sleet

cd ./source
dotnet build -c Release # Build the solution with release configuration

for path in "$PWD"/* # For everything inside the folder
do
  if [[ (-d $path) && ($path != *.Tests) ]]; then # If the path is a directory
    dotnet pack $path -c Release --force --include-symbols -o $path/package # Package the project
    nupkgs=`ls $path/package/*.nupkg`
    for f in $nupkgs # Go though the package files
    do
      sleet push $f --config ./sleet.json --source NugetSource # Push to the source
    done
  fi
done
What does this do?
- It will find the project folders and create Nuget packages using the
dotnet packcommand. - Then it will find the
.nupkgfiles and runsleet pushusing the./sleet.jsonfile as the configuration. on each of them to theNugetSource.
For this to work, we need the sleet.json file in the repository. This is the file where we specify the configuration for Sleet. Here we specify the sources that we are going to use. the source, for now, is the NugetSource which is the S3 bucket we have created. because we are not providing any credentials for S3 in this configuration, we will have to provide them as standard AWS environment variables later.
{
  "username": "<username>",
  "useremail": "<email>",
  "sources": [
    {
      "name": "NugetSource",
      "type": "s3",
      "bucketName": "<your bucket name>",
      "region": "<your bucket region>"
    }
  ]
}
Now we just have to tell the CI server that we want to run the push.sh script every time we push to a release branch. I use this configuration below to do that in Gitlab CI.
image: microsoft/dotnet:latest
stages:
  - build
  - release

build:
  stage: build
  script:
    - dotnet build

release:
  stage: release
  only:
    - release
  before_script:
    - chmod +x ./push.sh
  script:
    - bash ./push.sh
  environment:
    name: Production
What this does is it will run a build for every commit but only run the push script when we push our code to the release branch.
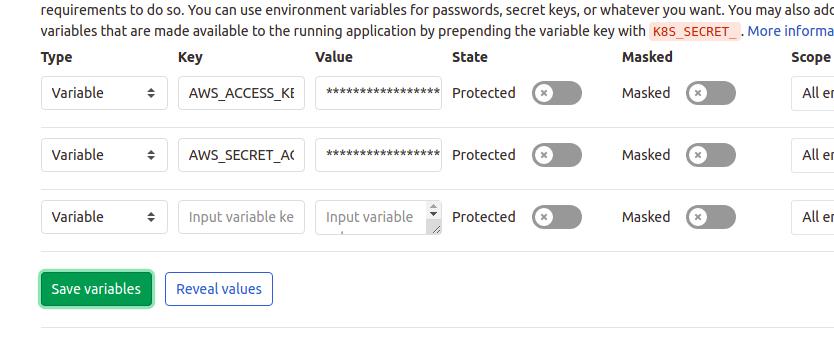
Now we have to add the credentials for the user that we created in the IAM console as environment variables in the CI server. the main two variables that are required are AWS_ACCESS_KEY_ID and AWS_SECRET_ACCESS_KEY.
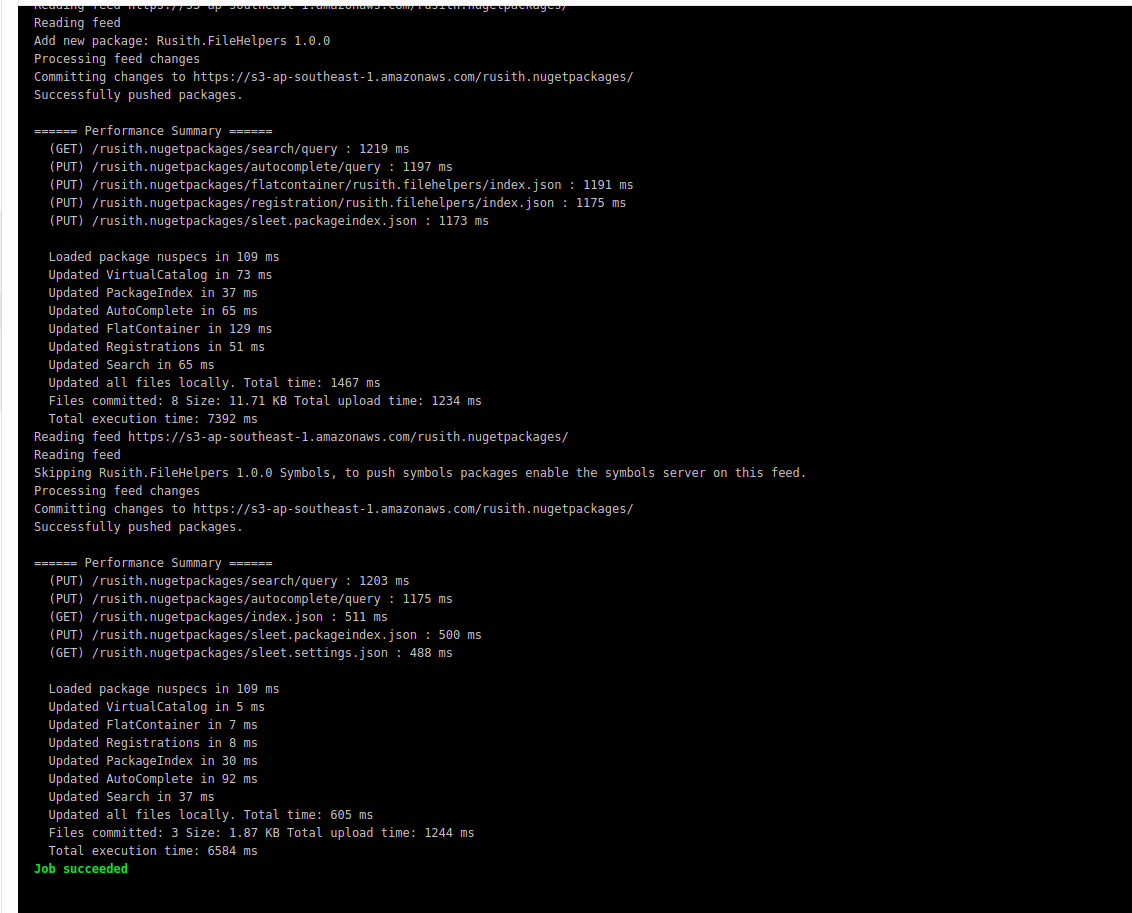
Now, everything is ready to go. Push your code to the release branch and it will build the project and Sleet will do its magic to create the Nuget source on S3.
If you have done everything correctly, You will see an output like below in the CI console.
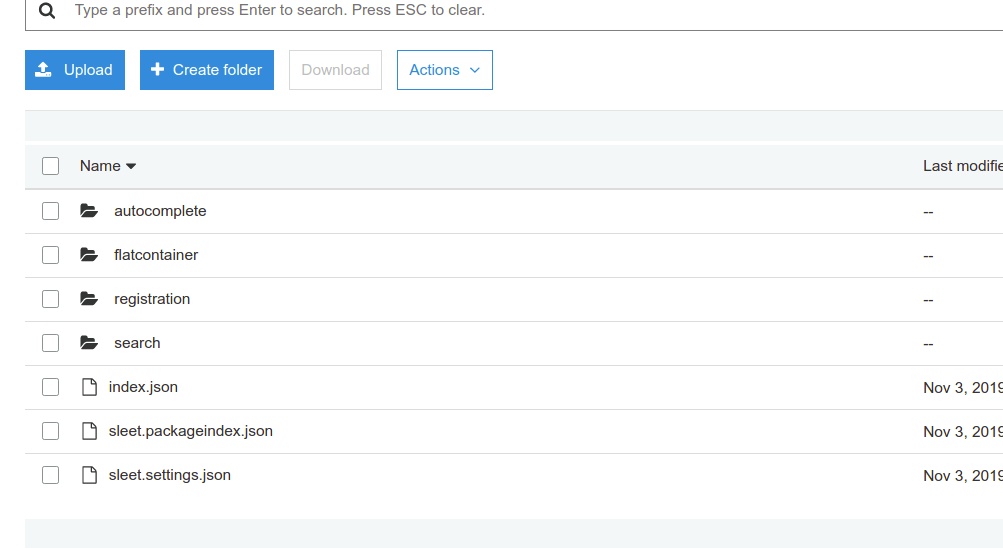
And the S3 Bucket content will be updated to look something like below.
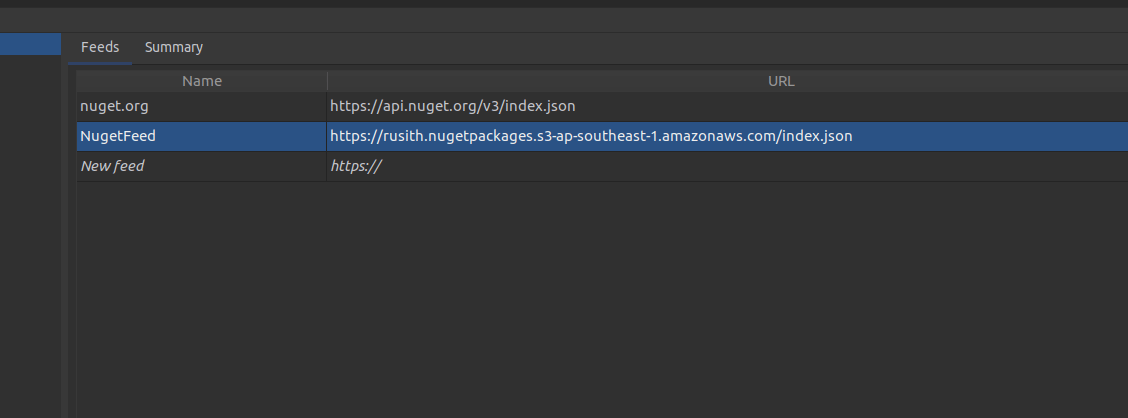
Now you can use the Nuget packages you just created. for this, you must first add the URL to the index.json file of the S3 bucket as a Nuget source in your IDE. something like below (Rider).
And now, you can use the Packages just like you would use a normal Nuget package.


